
johnson pocket door installation instructions
Johnson pocket door installation offers a space-saving, smooth-operating solution for privacy and style. The 1500 Series and 200PD Series provide durable, easy-to-install hardware for various door sizes and weights, ensuring a professional finish for residential and commercial projects.
Overview of Johnson Pocket Door Hardware Series
The Johnson Pocket Door Hardware Series includes the 1500 Series and 200PD Series, designed for durability and ease of installation. The 1500 Series offers a commercial-grade pocket door frame with all-steel split studs, self-tapping drywall screws, and compatibility with soft-close kits. The 200PD Series provides multi-pass pocket door hardware, ideal for heavier doors and smooth operation. Both series are engineered for versatility, supporting door sizes up to 36″ x 80″ and weights up to 150 lbs. These systems ensure a professional finish, making them suitable for residential and commercial applications.
Importance of Following Installation Instructions
Adhering to Johnson pocket door installation instructions ensures a smooth, problem-free setup. Proper steps prevent misalignment, weight issues, and structural damage. Following guidelines guarantees safety, durability, and optimal performance. Deviations risk compromising door stability and functionality, leading to costly repairs. Manufacturer-approved methods ensure compliance with weight and size limits, promoting long-term reliability. Detailed instructions also aid in meeting ADA accessibility standards, crucial for handicap accessibility. By following the manual, installers achieve professional results, maintaining Johnson’s quality standards and warranty validity. Compliance ensures a secure, efficient, and aesthetically pleasing pocket door system for years of trouble-free use.
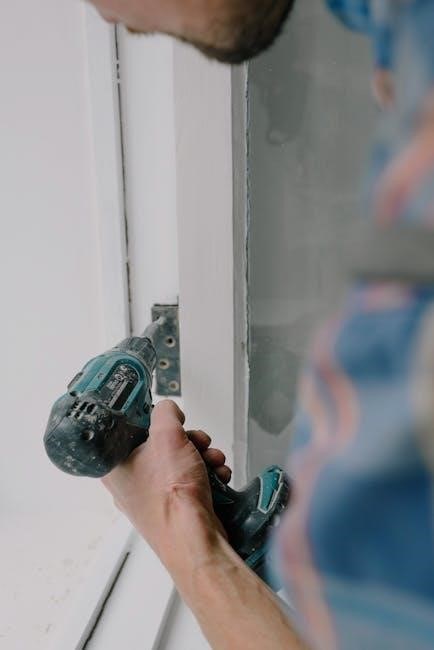
Tools and Materials Needed
Essential tools include a stud finder, level, drill, and saw. Materials required are the Johnson 1500 Series frame, track, hangers, and jamb kit for a smooth installation.
Essential Tools for Installation
The installation requires a stud finder to locate wall studs, a level to ensure proper alignment, and a drill for making precise holes. A saw is necessary for cutting the frame to the desired length. Additionally, a tape measure is needed for accurate measurements, and a screwdriver is essential for securing hardware. Pencil marks are used to guide cuts and placements. Safety glasses are recommended during cutting and drilling. Having all these tools ready ensures a smooth and efficient installation process for the Johnson pocket door system.
Required Materials for the Project
The Johnson pocket door installation requires a 1500 Series Pocket Door Frame or 200PD Series Multi-Pass Hardware. Materials include all steel split studs, self-tapping drywall screws, and trim screws. A soft-close kit is optional for smooth operation. Door locks and pulls are also necessary, along with the 1510/1511 Jamb Kit for secure installation. Ensure you have the correct door size and weight capacity, up to 150 lbs and 36″ x 80″. These materials are designed for 2×4 stud walls, providing a sturdy and reliable framework for your pocket door system.
Preparation and Planning
Measure the door opening accurately and check wall structure thickness, ensuring it meets Johnson’s 3-1/2″ minimum for 2×4 walls. Plan the layout carefully to align with the hardware series specifications.
Measuring the Door Opening
Accurate measurement of the door opening is critical for a proper fit. Measure the width and height of the opening, ensuring it matches the door size specifications. For standard doors, the opening should be slightly larger than the door dimensions to accommodate the frame and hardware. Use a level to ensure the opening is square and plumb. Double-check the measurements against the Johnson hardware requirements, especially for weight and size limits, to prevent installation issues. Proper measurement ensures smooth operation and alignment of the pocket door system.
Checking Wall Structure and Thickness
Verify the wall structure and thickness to ensure compatibility with Johnson pocket door hardware. Most systems require a minimum wall thickness of 3-1/2 inches (89mm) for 2×4 studs. Check for any wiring, plumbing, or obstructions in the wall cavity that could interfere with the pocket door installation. Ensure the wall is structurally sound to support the weight of the door, as specified by Johnson hardware guidelines. Use a stud finder to locate and mark wall studs for accurate installation. Proper wall preparation ensures a secure and stable pocket door system, avoiding future operational issues.
Understanding the Johnson Hardware Series
Johnson’s hardware series, including the 1500 Series and 200PD Series, offers durable, space-saving solutions for pocket doors, designed for smooth operation and long-lasting performance in residential and commercial settings.
Johnson 1500 Series Pocket Door Frame
The Johnson 1500 Series Pocket Door Frame is a heavy-duty, commercial-grade solution designed for 2×4 stud walls. It features all-steel split studs for durability and includes self-tapping drywall and trim screws. The frame accommodates door sizes up to 36″ x 80″ and supports weights up to 125 lbs. It is compatible with optional soft-close kits for enhanced functionality. The 1500 Series is versatile, fitting most standard door thicknesses and ensuring smooth operation. Its robust construction makes it ideal for both residential and commercial applications, providing a reliable and long-lasting pocket door system.
Johnson 200PD Series Multi-Pass Pocket Door Hardware
The Johnson 200PD Series is designed for multi-pass pocket door applications, offering heavy-duty performance for larger and heavier doors. It supports doors up to 150 lbs and 48″ in width, making it ideal for commercial and residential use. The hardware includes robust hangers and tracks, ensuring smooth and stable door operation. Compatible with the Johnson 1500 Series pocket door frames, the 200PD Series provides a reliable solution for multi-door systems. Its durable construction and ease of installation make it a popular choice for creating versatile, space-saving door configurations. It also works seamlessly with optional soft-close kits for added convenience.
Cutting Instructions for the Door Frame
Cutting Instructions for the Door Frame
Johnson pocket door frames are pre-marked for cutting to shorter lengths. Use a QR code for non-standard widths. Follow instructions carefully for smooth operation and proper fit.
Guidelines for Cutting the Pocket Door Frame
Johnson pocket door frames are pre-marked for cutting to shorter lengths. Use a reciprocating saw or circular saw for precise cuts. Measure carefully and cut along the marked lines. For non-standard widths, refer to the QR code provided for specific instructions. Ensure the frame remains square and aligned during the cutting process. After cutting, smooth any rough edges to prevent damage to the door or hardware. Always follow the manufacturer’s guidelines to maintain structural integrity and proper functionality. Cutting errors can lead to misalignment or instability, so double-check measurements before proceeding.
Special Instructions for Non-Standard Door Widths
For non-standard door widths, follow the QR code instructions provided with Johnson Hardware. Measure the door opening precisely and mark the frame accordingly. Use a fine-tooth saw or miter saw for smooth cuts. Ensure the frame remains square and aligned. Sand edges for a clean finish. If using the 1500PF or 200PD Series, consult the specific cutting guides. Proper adjustments are crucial to maintain the frame’s structural integrity and ensure smooth door operation. Always refer to the manufacturer’s guidelines for accurate modifications to avoid installation issues. Double-check all measurements before proceeding with the cut.
Installing the Pocket Door Frame
Johnson pocket door frames require precise alignment and secure fastening. Attach the split header and casing to the wall studs, ensuring level and plumb positioning for smooth operation.
Step-by-Step Frame Installation Process
Begin by preparing the wall opening, ensuring it matches the door size and studs are properly spaced. Attach the split header to the top of the opening, securing it with screws. Next, install the side tracks, aligning them with the header. Mount the bottom track and ensure all components are level and plumb. Use self-tapping drywall screws to fasten the frame securely. Finally, attach the casing to cover the edges, completing the frame installation. This process ensures a sturdy foundation for the pocket door system.
Securing the Split Header and Casing
Start by aligning the split header with the wall studs and attaching it using self-tapping drywall screws. Ensure the header is level and securely fastened. Next, install the casing around the door opening, nailing it into place with finish nails. Make sure the casing is flush with the wall and aligns properly with the header. Double-check that all components are plumb and level before proceeding. This step ensures a stable and visually appealing frame for the pocket door system.

Assembling and Mounting the Door
Attach the door plate to the top of the door, ensuring proper alignment with the track. Mount the hangers securely and hang the door, checking for smooth operation and proper weight distribution;
Attaching the Door Plate and Hangers
Mounting the Door on the Track
Once the door plate and hangers are securely attached, carefully align the door plate with the track system. Ensure the door is centered within the opening and the hangers are evenly spaced. Gently lower the door onto the track, making sure the rollers on the hangers engage smoothly with the track. Check the alignment by sliding the door back and forth; if it moves unevenly, adjust the hangers or track as needed. Secure the hangers to the track using the provided screws, ensuring they are tightened firmly. Test the door’s operation to confirm smooth movement and proper weight distribution. Always follow the manufacturer’s guidelines for weight limits and adjustments.
Installing the Jamb Kit
The Johnson 1500 Series jamb kit provides a universal solution for pocket door frames, including prefinished jambs, split header, and casing for a seamless installation process.
Universal Jamb Kit for Johnson Pocket Doors
The Johnson Universal Jamb Kit is designed for compatibility with most pocket door frames, ensuring a secure and aligned installation. It includes prefinished jambs, split headers, and casing components for a polished look. This kit is ideal for standard door sizes, streamlining the process for both professionals and DIYers. The universal design accommodates various door widths and heights, making it adaptable to different projects. By following the provided instructions, the jamb kit ensures a stable and visually appealing frame for your pocket door system. Proper alignment and fastening are crucial for optimal functionality and durability.
Aligning and Fastening the Jambs
Proper alignment and secure fastening of the jambs are critical for a stable pocket door installation. Begin by ensuring the jambs are level and plumb, using shims if necessary to achieve proper alignment. Once aligned, fasten the jambs to the surrounding wall structure using the provided screws or appropriate fasteners. Make sure the jambs are evenly spaced and flush with the wall surface for a seamless appearance. After securing, check the door’s movement to ensure it glides smoothly without obstruction. Properly aligned and fastened jambs ensure long-lasting performance and a professional finish for your pocket door system.

Adding Hardware and Accessories
Enhance functionality with door locks, pulls, and optional soft-close kits. These accessories ensure smooth operation and convenience, complementing the Johnson pocket door system’s durability and design.
Installing Door Locks and Pulls
Secure your pocket door with Johnson’s high-quality locks and handles. Install locks by aligning the strike plate with the door frame, ensuring proper latch engagement. For pulls, position them at a comfortable height, typically around 36-40 inches. Use provided screws to fasten both locks and pulls, ensuring they are level and securely attached. These accessories enhance functionality and aesthetics, providing a polished finish to your pocket door system. Always follow the manufacturer’s guidelines for precise installation.
Optional Soft-Close Kit Installation
Enhance your Johnson pocket door system with the optional Soft-Close Kit for smooth, quiet operation. Designed for compatibility with the 1500 Series and other Johnson hardware, this kit ensures doors close gently without slamming. Installation involves attaching the soft-close mechanism to the track and door plate, requiring basic tools like a screwdriver. The kit is pre-assembled for ease of use and does not require additional components. Follow the manufacturer’s guidelines to ensure proper alignment and functionality. This upgrade adds convenience and sophistication to your pocket door setup, making it ideal for residential and commercial applications.

Troubleshooting Common Issues
Common pocket door issues include misalignment, tracking problems, and weight limitations. Address these by adjusting the track, ensuring proper door alignment, and verifying weight capacity compliance.
Addressing Misalignment and Tracking Problems
Misalignment and tracking issues are common during pocket door installation. Start by ensuring the track is securely fastened and level. Check that all brackets are properly aligned with the door hangers. If the door sags or binds, adjust the hanger positions slightly. Lubricate the rollers to ensure smooth operation. For severe misalignment, verify that the wall structure is plumb and the header is evenly supported. Refer to the Johnson Hardware manual for specific adjustment instructions to resolve any tracking issues effectively and maintain proper door function.
Solving Weight and Size Limitation Issues
Ensure the door weight does not exceed the Johnson Hardware Series limit (125 lbs max). Verify door size matches the frame specifications (max 36″ x 80″). For doors exceeding these limits, consider upgrading to a heavy-duty frame or consulting a professional. Check wall thickness and structure to support the weight. Use optional reinforcement kits if necessary. Adjust the header for larger doors and ensure proper alignment of tracks and hangers. Lubricate rollers for smooth operation. Always refer to Johnson Hardware guidelines for specific solutions to weight and size limitations during installation.
Manufacturer’s Resources and Support
Johnson Hardware provides detailed installation manuals, video tutorials, and customer support to ensure successful pocket door installations. Their resources include guides for troubleshooting and ADA compliance.
Johnson Hardware Installation Manuals and Guides
Johnson Hardware offers comprehensive installation manuals and guides for their pocket door systems, ensuring clarity and ease for both professionals and DIYers. These resources include step-by-step instructions, diagrams, and troubleshooting tips. The 1500 Series manual, for example, details how to assemble and mount the frame, attach door plates, and secure headers. Additionally, video tutorials and animated guides provide visual support, covering topics like soft-close kit installation and door alignment. These materials are accessible online, making it easy to follow Johnson’s proven methods for a successful installation.
Video Tutorials and Animated Instructions
Johnson Hardware provides video tutorials and animated instructions to guide users through the installation process. These resources cover topics like frame assembly, door mounting, and soft-close kit installation. The 1500 Series pocket door frame installation is demonstrated in a 3D animated video, offering a clear visual guide. QR codes are included in manuals for quick access to these tutorials. Videos are available on platforms like YouTube and the official Johnson Hardware website, ensuring users can follow along step-by-step. These resources are designed to help professionals and DIYers achieve a smooth and accurate installation.
ADA Compliance and Accessibility
Johnson pocket door systems meet ADA standards, ensuring accessibility for all users. Hardware designs include features like raised door handles for easy operation, promoting inclusivity and convenience.
Ensuring Handicap Accessibility in Pocket Door Installation
Johnson pocket door systems are designed to meet ADA standards, ensuring accessibility for individuals with disabilities. Proper installation involves placing door handles at a maximum height of 48 inches from the floor for easy reach. The door must swing in a way that provides a clear floor space of at least 60 inches in diameter for wheelchair maneuverability. Additionally, thresholds should be flush with the floor to avoid tripping hazards. Johnson hardware, including soft-close mechanisms, enhances ease of use, making the pocket door system inclusive and user-friendly for all individuals.
Meeting ADA Standards for Pocket Doors
Johnson pocket door systems are designed to comply with ADA standards, ensuring accessibility and ease of use for all individuals. Proper installation requires a clear floor space of at least 60 inches in diameter on both sides of the door. Door handles must be installed between 34 and 48 inches above the floor for easy access. Additionally, thresholds should not exceed ½ inch in height to prevent tripping hazards. Johnson hardware, including soft-close mechanisms, supports these requirements, ensuring the door operates smoothly and meets all accessibility guidelines for handicap-friendly environments.