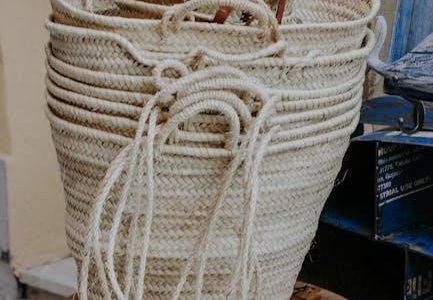
rope basket tutorial
Welcome to this creative guide on crafting stunning rope baskets! Discover how to transform simple rope into functional and decorative pieces for your home or gifts․
Overview of Rope Basket Crafting
Rope basket crafting is a versatile and creative activity that transforms simple materials like rope, fabric, and thread into functional and decorative items․ This craft combines coiling, sewing, and shaping techniques to produce unique storage solutions or stylish home decor pieces․ Suitable for beginners and experienced crafters alike, rope basket making allows for endless customization, from choosing colors and textures to experimenting with shapes and sizes․ Whether you prefer no-sew methods or sewing machine projects, this craft offers a rewarding way to create personalized baskets for organizing, gifting, or adding a handmade touch to your space․ It’s a fun and practical way to explore your creativity while producing something truly useful․
Benefits of Making Your Own Rope Basket
Creating your own rope basket offers numerous benefits, including the ability to customize the design to suit your personal style and needs․ By choosing your materials, colors, and sizes, you can craft a unique piece that complements your home decor or serves as a thoughtful gift․ This DIY project is also eco-friendly, as it often utilizes repurposed or sustainable materials․ Additionally, making your own rope basket can be cost-effective compared to purchasing pre-made items․ It’s a rewarding way to express your creativity while producing a functional and decorative item for storage, organization, or personal use․ This handmade approach ensures a one-of-a-kind result that reflects your individuality and skill․
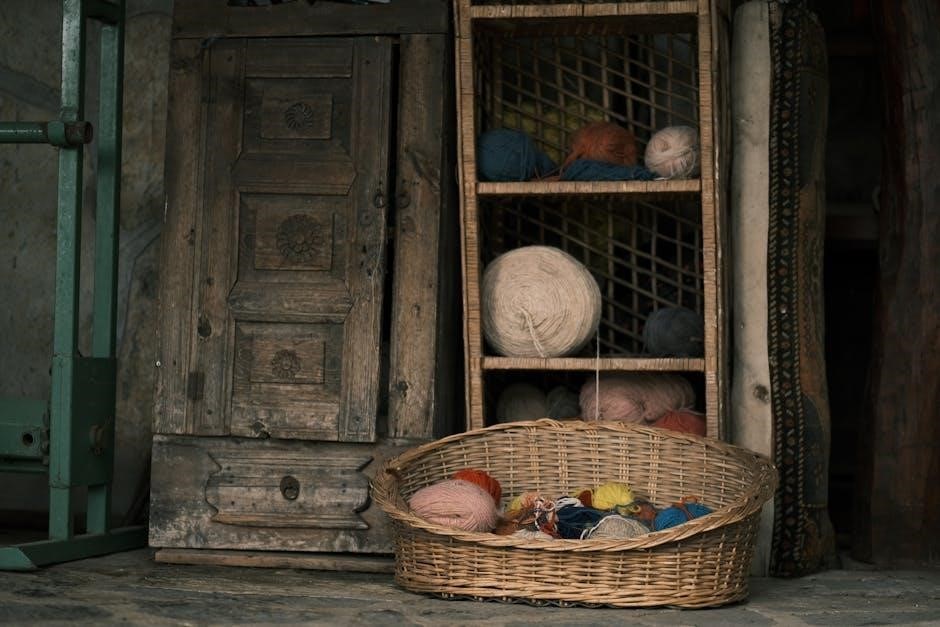
Materials and Tools Needed
Gather durable rope, strong adhesive, scissors, and optional sewing tools․ These essential supplies ensure a sturdy and well-crafted rope basket for storage or decoration․
Essential Supplies for Rope Basket Making
To begin your rope basket project, you’ll need a few key materials․ Start with a high-quality rope, such as cotton, nylon, or macrame rope, which is durable and easy to work with․ A strong adhesive, like hot glue or fabric glue, is necessary for securing the coils․ Sharp scissors or a craft knife will help you cut the rope neatly․ A measuring tape or ruler ensures accuracy in shaping your basket․ Optional supplies include fabric strips for wrapping or decorative stitching․ These materials will provide a solid foundation for your DIY rope basket, allowing you to create a sturdy and visually appealing design․
Tools Required for the Project
Gathering the right tools is crucial for a smooth rope basket-making experience․ Essential tools include sharp scissors or a craft knife for cutting the rope cleanly․ A hot glue gun or fabric glue is necessary for securing the coils together․ A measuring tape or ruler helps in maintaining consistent sizing․ Optional tools like a sewing machine can be used for stitching fabric-wrapped ropes, while a pencil or marker is handy for marking measurements․ A flat surface, like a table, is ideal for coiling and shaping the basket․ These tools will help you achieve precision and stability as you craft your rope basket, ensuring a professional finish and durability․
Choosing the Right Rope for Your Basket
Selecting the right rope is vital for durability and aesthetics․ Cotton rope is a popular choice due to its sturdy texture and natural appearance․ Consider thickness and color to ensure functionality and style․
Types of Rope Suitable for Basket Making
Cotton rope is a popular choice for basket making due to its sturdy texture and natural appearance, making it ideal for both functional and decorative baskets․ Macramé rope, with its soft and flexible strands, is perfect for intricate designs and knotting techniques․ Jute rope offers a rustic, eco-friendly option, while nylon rope provides durability and water resistance, suitable for outdoor or heavy-duty baskets․ Each type of rope has unique characteristics, allowing crafters to choose based on desired aesthetics, strength, and intended use․ Selecting the right rope ensures a successful and long-lasting basket-making project․
Factors to Consider When Selecting Rope
When choosing rope for basket making, consider durability, flexibility, and thickness․ Durable ropes like nylon or jute are ideal for heavy-duty baskets, while softer ropes like cotton or macramé are better for decorative or lightweight projects․ Flexibility is crucial for shaping and coiling, so opt for ropes that can bend easily without breaking․ Thickness affects the basket’s size and structural integrity—thicker ropes create sturdier baskets but may limit detail work․ Additionally, consider color and texture to match your desired aesthetic․ Cost and availability are also important factors, as some ropes may be more expensive or harder to find․ Selecting the right rope ensures your project turns out as envisioned․
Step-by-Step Guide to Making a Rope Basket
Learn to craft a rope basket by coiling and securing layers․ Start with a base, build sides, and shape as desired․ Use glue or stitching for stability․
Preparing the Rope for Coiling
Begin by cutting the rope into a manageable length, ensuring it’s free from tangles․ If using fabric-wrapped rope, wrap the fabric tightly around the cord, securing it with a dot of hot glue․ For a smooth coil, lightly apply glue to the rope’s end to prevent fraying; Coil the rope into a small circle, forming the base․ As you coil, apply a thin layer of glue between each layer to hold it in place․ Allow the glue to dry slightly before proceeding․ This step ensures a sturdy foundation for your basket․ Proper preparation is key to achieving a neat, professional-looking coil․
Creating the Base of the Basket
Begin by wrapping the prepared rope end around itself to form a small coil, securing it with a dot of glue․ Place the coil on a flat surface and gently press down to flatten it slightly, ensuring a stable base․ Continue coiling the rope around the base, applying a small amount of glue between each layer to hold it in place․ As you coil, guide the rope to form a perfect circle or oval shape, depending on your desired design․ Allow the glue to set briefly before moving on to build the sides․ A well-crafted base is essential for a sturdy and visually appealing basket․
Building the Sides of the Basket
Once the base is secure, begin building the sides by coiling the rope upward, ensuring each layer is evenly spaced and aligned․ Apply a small amount of glue between each coil to maintain stability․ Use your fingers or a flat tool to gently press and shape the coils into the desired height․ As you progress, you can slightly angle the coils outward to create a wider opening or keep them straight for a more uniform look․ To maintain consistency, rotate the basket as you work, ensuring even distribution of the rope․ For a polished finish, trim any excess glue or uneven ends with scissors or a needle․
Securing the Coils withGlue or Stitching
Securing the Coils with Glue or Stitching
To ensure your rope basket’s durability, securing the coils is essential․ Apply a thin layer of strong adhesive, like hot glue or fabric glue, between each coil, pressing firmly to bond them․ For a more permanent solution, use a needle and thread to stitch through the coils, weaving in and out to lock them in place․ This method adds strength and prevents the coils from shifting over time․ If using glue, allow it to dry completely before handling the basket․ Stitching provides a decorative touch and extra stability, especially for larger or heavier baskets; Both methods ensure a sturdy and long-lasting finish to your handmade rope basket․

Adding a Lid to Your Rope Basket
Add a functional and decorative touch by creating a lid for your rope basket․ Measure and cut the lid to fit perfectly, then secure it using glue or stitching for a polished finish․
Measuring and Cutting the Lid
To create a well-fitting lid, measure the diameter of your basket’s opening․ Add a small margin to ensure the lid fits securely․ Cut the rope to the desired length, ensuring it matches the basket’s circumference for a seamless fit․ Use a ruler or measuring tape for accuracy․ For a rounded lid, shape the rope into a circle or oval, securing it with glue or stitching․ If using fabric, cut a piece slightly larger than the basket’s opening․ Fold the edges under and sew or glue in place․ A properly measured and cut lid ensures a polished, functional finish․ Watch a video guide for precise techniques and tips on achieving the perfect fit․
Attaching the Lid to the Basket
Attaching the lid to your rope basket requires precision and the right materials․ Start by ensuring the lid is centered on the basket’s opening․ Use a ruler or measuring tape to align it properly․ For a secure attachment, apply a thin layer of hot glue around the edges of the lid and press it firmly onto the basket․ Alternatively, use a needle and thread to stitch the lid in place, weaving the thread through the rope coils for a seamless look․ If using fabric-wrapped rope, fold the edges under and sew or glue them to the basket’s rim․ Ensure the lid fits snugly and can be easily opened or closed․ For added functionality, consider attaching a small handle or fastening mechanism․ Watch a tutorial for step-by-step guidance on achieving a professional finish․ Proper attachment ensures durability and a polished appearance, making your rope basket both functional and aesthetically pleasing․ Regular testing of the lid’s attachment is recommended to ensure stability and security, especially if the basket will hold weight․ Balancing the lid’s weight with the basket’s structure is crucial for long-term use․ With careful attachment, your rope basket will be complete and ready for use․
Customizing Your Rope Basket
Personalize your rope basket with unique handles, decorative stitching, or colorful accents․ Add texture by incorporating fabric strips or beads for a personalized touch․
Adding Handles for Functionality
Add practicality and style to your rope basket by incorporating handles․ Use fabric strips, leather, or additional rope to create sturdy, comfortable handles․ Attach them securely with glue, stitching, or knots for durability․ Handles not only enhance functionality but also elevate the basket’s aesthetic appeal, making it perfect for carrying items or as a decorative element․ Ensure the handles are proportional to the basket size and evenly spaced for a balanced look․ This step transforms your basket into a versatile and functional piece, ready for daily use or as a thoughtful handmade gift․
Decorative Ideas for Personalization
Elevate your rope basket’s charm with personalized touches․ Consider dyeing the rope for a vibrant look or adding beads and buttons for a unique flair․ Use fabric scraps to add texture and color; You can also experiment with coiling patterns like spirals for visual interest․ Adding a lid with a tassel or decorative handle enhances functionality and style․ Personalize with initials using paint or embroidery floss․ Combine different rope colors or materials for a distinctive appearance․ Ensure decorations are proportional to the basket size and purpose․ Start with simple embellishments like beads or a decorative handle before exploring more complex designs․ These creative additions make your basket truly one-of-a-kind and functional․
Tips and Tricks for Perfect Rope Baskets
Achieve professional results with these tips: Use a sharp needle for clean stitching, maintain tight coils for stability, and apply glue evenly to secure layers․ Start small to refine techniques before tackling larger projects․
Enhancing Durability and Stability
To ensure your rope basket is both durable and stable, applying a clear coat of varnish or sealant can protect it from moisture and wear․
Using a sturdy base layer, like a dense coil, provides structural integrity, while tight stitching prevents gaps․
Reinforce weak points by wrapping them with additional rope or thread․
For added strength, consider using a combination of glue and stitching to secure each coil․
These techniques will help your basket withstand daily use and maintain its shape over time․ Perfect for storing items or decoration, a well-crafted rope basket is both functional and long-lasting․

Alternative Rope Basket Designs
Explore unique rope basket designs, from oval shapes to macrame-inspired patterns․
Experiment with colored threads, fabric-wrapped ropes, or textured materials for a personalized touch․
These creative variations add style and versatility to your handmade baskets․
Exploring Different Shapes and Sizes
Rope baskets aren’t limited to traditional round shapes; Experiment with oval, rectangular, or even hexagonal designs for a unique look․ Use molds or base patterns to guide your coiling process․ For smaller baskets, perfect for trinkets, use thinner ropes and tighter coils․ Larger baskets, ideal for storage, can be made with thicker ropes and looser weaves․ Adjust the size by varying the number of coils or layers․ To maintain structural integrity, ensure even spacing and consistent tension․ Try combining ropes of different textures or colors for a personalized touch․ With creativity, you can craft baskets tailored to any purpose or decor, making each piece truly one-of-a-kind․
Incorporating Color and Texture
Add personality to your rope baskets by experimenting with color and texture․ Use dyed or natural ropes in various hues to create vibrant designs․ Mix rope types, like cotton and macrame, for contrasting textures․ Enhance visual interest by layering ropes of different thicknesses or weaving in fabric scraps․ For a polished look, stain or paint the rope before coiling․ Embellish with tassels, beads, or embroidery floss for a decorative touch․ Consider wrapping rope with yarn or ribbon for added texture․ Balancing color and texture ensures your basket is both functional and visually appealing․ Let your creativity shine by experimenting with unique combinations to create one-of-a-kind pieces that reflect your personal style․
Troubleshooting Common Issues
Address common challenges like uneven coils or weak points with simple fixes․ Ensure tight coiling, use glue for stability, and reinforce stressed areas for durability and a polished finish․
Fixing Uneven Coils or Gaps

Identifying uneven coils or gaps early ensures a polished finish․ To fix, gently unwind the affected area and rewrap the rope, applying even tension․ Use a small dot of glue to secure if needed․ For larger gaps, insert a thin object like a chopstick to spread the coils evenly․ Allow the glue to dry completely before continuing․ This method maintains structural integrity and prevents the basket from becoming misshapen․ Regularly inspecting your work as you go helps catch issues before they become problematic, ensuring a professional-looking result․ Patience and attention to detail are key in achieving a sturdy and visually appealing basket․
Reinforcing Weak Points in the Basket
Identifying weak points early is crucial for durability․ Apply a small amount of glue to reinforce areas where coils may separate․ For added strength, wrap a thin strip of fabric or twine around the vulnerable sections․ Allow the adhesive to dry completely before handling․ This method prevents the basket from losing its shape and ensures long-lasting use․ Regular inspection and reinforcement during the crafting process will result in a sturdy and reliable final product, making it perfect for storing items or as a decorative piece․ Reinforcement is a simple step that significantly enhances the basket’s overall stability and functionality․
Crafting a rope basket is a rewarding project that combines creativity with practicality․ With patience and practice, you can create beautiful, functional pieces for your home or gifts․
Final Thoughts on Rope Basket Crafting
Creating a rope basket is a fulfilling DIY project that allows you to personalize your home decor or gifts․ With simple materials like rope and glue, you can craft unique, functional pieces that reflect your personal style․ Whether you’re a beginner or an experienced crafter, this tutorial provides a clear guide to help you achieve professional-looking results․ Experiment with different ropes, colors, and designs to expand your creativity․ Remember, practice makes perfect, so don’t hesitate to try new techniques and ideas․ Happy crafting!
Encouragement to Experiment and Create
Don’t be afraid to let your creativity shine! Rope basket crafting is a versatile craft that allows for endless experimentation․ Try different rope types, colors, and patterns to create unique designs․ Add embellishments like tassels or beads for a personalized touch․ Whether you’re making a storage basket or a decorative piece, each project is an opportunity to explore new ideas․ Share your creations with friends or give them as thoughtful gifts․ Remember, every coil and stitch is a step toward mastering this craft․ Keep experimenting, and soon you’ll be creating stunning rope baskets that reflect your individuality and style․